Taking on Ordinary
  • Blog
  • Recipes
    • Food Recipes
    • Household Recipes
  • Frugal Ideas
  • House Renovations
    • Brookhollow Flip
  • Family Theme NIghts

Cheeseburger Cauliflower

9/26/2016

0 Comments

 
Picture
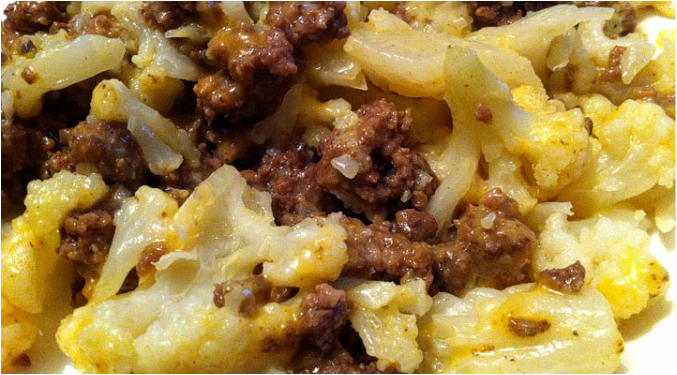
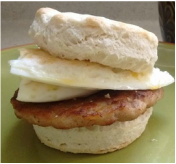
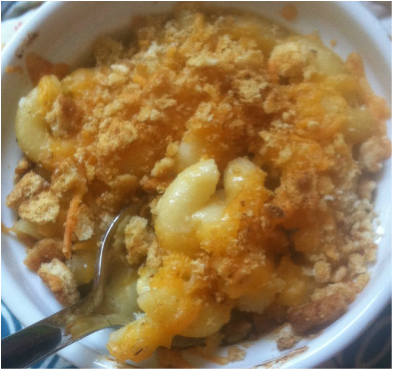
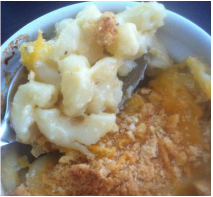
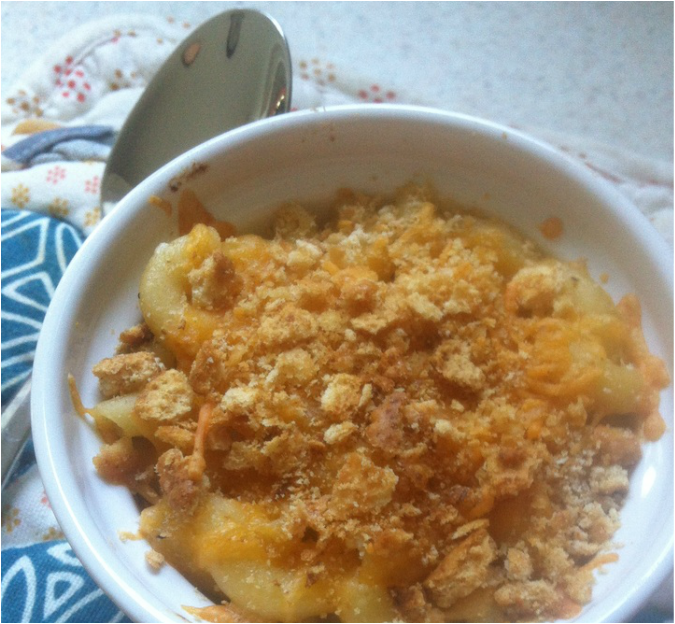
There's this thing I've noticed people do in order to make unhealthy dishes healthy or low carb. They substitute a starch (or even meat) with cauliflower. Buffalo Cauliflower (instead of buffalo wings), Cauliflower fried rice, etc. I've been slightly intrigued, but none of the recipes had me convinced until I saw this picture of what someone called, "Cheeseburger Cauliflower" on Pinterest. It looked good and it still had meat in it, so I really wanted to try it. Now, I pinned this picture (the one you see above) over a year ago, but every time I thought or attempted to make it, Shane would say, "Eew." or, "Oh hell no, I'm not eating cauliflower!" But last night when he said he wasn't that hungry and I said I was, I realized I had an opportunity to make it and get him to try it! If he didn't like it, it didn't matter because he wasn't hungry anyway, right? 

So I made it and I filmed Shane trying it. 
He said, "I don't want to like it, but I do!" I thought the same. It was really good, and I didn't feel guilty about devouring some cake for dessert afterwards! ;)

Oh, Josiah liked it too! The link to the picture I found on Pinterest didn't work, so I made up this recipe. I hope you try it and like it too!  

Cheeseburger Cauliflower

Ingredients:
  • 1 head of cauliflower
  • 1 small onion, diced
  • 1/2 - 1 pound of ground beef
  • 1 tsp minced garlic
  • 1 1/2 cups shredded cheddar cheese
  • salt and pepper, to taste
Instructions: 
  1. Chop up a head of cauliflower and steam in steamer, or in a pot with water over the stove. 
  2. Meanwhile, brown ground beef in a skillet with the onion and garlic. Add salt and pepper to taste. 
  3. When cauliflower is steamed, add a desired amount to the skillet with the beef, and chop it up a little more. (I was looking for the cauliflower to be chopped up into bite sized pieces, like diced potatoes. Also, I only used two thirds of the cauliflower. I wanted the recipe to taste like the ratio of cauliflower to ground beef was even.)
  4. Add cheese and mix until it is melted and blended in. Add more salt and pepper as needed. Enjoy! 
0 Comments

Homemade Chili and Pumpkin Cornbread

9/22/2016

0 Comments

 
Picture
Today is the first day of Fall, but Alabama weather disagrees. While I am thankful I live in a warmer climate, I am sad I cannot yet enjoy the look/smell of crisp leaves outside, and bundle up by the fire at night with some soup. But it is the first day of Fall and I know I'm not the only one who wants to celebrate it! I won't be joining others with their sweaters and boots on, but I will enjoy a meal that has Fall written all over it without breaking too much of a sweat. 

So, how about some chili served with some pumpkin cornbread? I think I'll make/freeze extra for chili dogs or chili cheese fries on Football Sunday too. ;)

Both recipes are super easy to throw together, and I highly suggest you do like me and make extra to freeze. It's always nice to have instant meals for busy weeknights that are homemade and make your body feel so much better than those store bought, processed instant foods! 

Homemade Chili

Picture
Ingredients:
  • 1 lb ground beef
  • 2 roma tomatoes, diced
  • 1 6oz can tomato paste
  • 1 yellow onion, diced
  • 3 stalks celery, finely chopped
  • 2 diced bell peppers
  • 1 can diced green chiles
  • 4 beef boullion cubes
  • 2 cups water

  • 4 tbsp chili powder 
  • 1 tbsp Worcestershire​
  • 1 tbsp garlic
  • 1 tbsp oregano
  • 2 tsp Tobasco
  • 1 tsp basil
  • 1 tsp salt
  • 1 tsp pepper
  • 1 tsp paprika
  • 1 tsp sugar
Optional Ingredients: 2 cans chili beans, and for toppings: cheddar cheese, sour cream, green onion, and fritos or crushed tortilla chips.
Directions:
  1. Cook ground beef in a stockpot over medium heat. When the beef is half way cooked through, add in the onion, peppers, and green chiles and continue cooking until meat is fully browned. 
  2. Add everything else (except topping ingredients) to the pot and it simmer on low heat, covered for an hour, stirring occasionally. Taste and adjust spices as needed.
  3. Pour into a bowl and top with your favorite toppings. Also tastes great over a baked potato!  

Pumpkin Cornbread

(This is an adapted recipe from Sweet Pea's Kitchen.)
Picture
Ingredients:
  • 1 cup flour
  • 1 tbsp baking powder
  • 1 tsp salt
  • 1/2 tsp cinnamon
  • 1/4 tsp nutmeg
  • 1/2 cup brown sugar
  • 1 cup yellow cornmeal
  • 2 eggs
  • 1/2 of a 15 oz
can pumpkin puree
  • 1/4 cup olive oil
  • 1 tbsp honey
Directions:
  1. Preheat oven to 400 degrees and grease an 8 x 8 pan. ​
  2. Mix all dry ingredients (flour through cornmeal) together and set aside. In another bowl, blend all wet ingredients (eggs through honey). 
  3. Stir the wet and dry ingredients together just until combined.
  4. Pour batter into 8 x 8 pan and smooth out to evenly cover the pan. Bake for 25 - 30 minutes.  
You can freeze this pumpkin cornbread and eat it with your leftover chili! When it's completely cooled, put it in a zip lock bag and freeze. To reheat, put it in a cake pan or on a cookie sheet, cover with foil, and bake in the oven at 400 degrees for 10 - 15 minutes. 
0 Comments

Ciabatta Rolls (and Fancy Sandwiches)

4/8/2016

1 Comment

 
Picture
I went grocery shopping at Aldi earlier this week and while pondering my bread of choice for sandwiches, I noticed they had ciabatta rolls for only $2. I've always identified ciabatta bread to what you get when buying a $10 sandwich at gourmet restaurants and bakeries, but seeing that $2 price tag made me realize I could make those fancy sandwiches at home and save money and cravings for eating out at those fancy restaurants. 

By the way, ciabatta bread also tastes AMAZING when toasted with jelly for breakfast in the mornings, or toasted in the oven with butter with dinner! Here are two sandwiches I made using ciabatta bread. Instead of meeting your girlfriends out at those expensive bakeries, why not make these and picnic outside on a beautiful Spring day! 

Fancy Pants Avocado Club Sandwich

Picture
Ingredients: 
  • Ciabatta Bread
  • Oven roasted Turkey deli meat
  • Cooked Bacon
  • Sliced Avocados
  • Apricot Preserves Jam
  • Provolone or Swiss Cheese (Optional)
Instructions: 
  1. Preheat oven for 400 degrees. 
  2. Slice open a ciabatta roll. On the bottom side, spread a layer of apricot jam. Assemble the remaining ingredients in on top in the following order: turkey breast, cheese, bacon, avocado slices, top piece of roll. 
  3. Bake in the oven for 5 - 7 minutes, just until bread is warm and a little crispy. 
  4. Enjoy. Tastes even fancier if served/eaten with sweet potato chips. 

Fancy Pants Italian Sub

Picture
Ingredients: 
  • Ciabatta Bread
  • Ham Deli Meat (I prefer Black Forest)
  • Salami
  • Pepperoni (the big deli slices are best)
  • Provolone or Mozzarella Cheese
  • Sliced Red Onion
  • Lettuce
Instructions: 
  1. ​​Slice a ciabatta roll in half. Assemble meat as follows on bread: ham, salami, pepperoni, and cheese, and top of roll. 
  2. Bake in oven at 400 degrees for 5 - 7 minutes, or until cheese is melted and bread is warm and slightly crispy. (This step is optional; The sandwich also tastes good cold.)
  3. Fill sandwich with sliced onions, lettuce, and mayo or Italian dressing if desired.
  4. Enjoy.  
1 Comment

King Cake (it's legit!)

2/7/2016

0 Comments

 
Picture
Two weeks ago Shane brought it to my attention that it was "king cake season," and I needed to get on making a king cake because, "It's not a king cake if you wait until after Mardi Gras." So I made one. If you are from or are familiar New Orleans and the Mardi Gras traditions, you know that Haydel's Bakery makes a good, authentic king cake. Well last year I found their recipe online. Though it is THE recipe, I found it to be lacking (they also don't include the necessary icing recipe so I had to make that and add it). Two years ago Shane and I tried a king cake with praline pecan filling that I thought was AMAZING, so I subbed out the Haydel's cinnamon sugar filling for praline pecan. Basically, I have created a king cake that takes Haydel's dough recipe, and adds icing and praline pecan filling. 

Shane's grandfather passed away last week and we went to New Orleans to be with the family. While we were there, Shane's mom bought us a Randazzo's king cake. It was GOOD, but guess what Shane said to me?! I quote: "This is good, but I like your king cake better." What a compliment for the Texan cook who had never even heard of a king cake until a few years ago! 

All that said, here is the recipe. Shane liked it, Josiah liked it, and I think you will too. Happy Mardi Gras! 
Picture

King Cake (with praline pecan filling)

Picture
Dough Ingredients: 
  • 1/3 cup sugar
  • 1 tsp salt
  • 1/2 cup shortening
  • 4 cups flour
  • 2 large eggs
  • 1 cup WARM milk
  • 2 packs active dry yeast
  • 1/4 tsp lemon extract
  • 1/4 tsp vanilla extract
  • 1/4 tsp orange extract


Filling:
  • 1/4 cup butter (melted and cooled)
  • 1 cup crushed pecans
  • 1/2 cup brown sugar
  • 1 tsp vanilla extract
  • 1 tsp cinnamon
Icing:
  • 2 cups powdered sugar
  • 1 1/2 tablespoons softened butter
  • 1/2 tsp vanilla extract
  • 1/4 tsp salt
  • 3 to 4 tablespoons milk
Sprinkles:

Pour sugar into three separate bowls. Use food coloring to make yellow, green, and purple. 
Instructions:
  1. ​In a stand mixer, blend the sugar, salt, and shortening until well creamed. Add eggs while mixing. 
  2. In a separate bowl, mix the milk, yeast, and extracts.
  3. Blend milk mixture into the sugar mixture and add in the flour until the dough tightens. (I add in flour until the dough is pulling itself into a ball on the paddle and away from the bowl.)
  4. Take dough off the paddle, knead into a ball, and cover with a towel. Let rest in a warm place for 1 and 1/2 hours.
  5. While dough is resting, mix the pecans, brown sugar, vanilla, and cinnamon in a small bowl and set aside. 
  6. Take dough and roll out into a rectangle on a lightly floured surface. Spread butter over the dough and top with the pecan mixture. Fold the dough in half, lengthwise. Cut into 3 strips and braid the dough. then place it onto a cookie sheet, and fold it into a circle. (This is not easy, nor did mine look pretty. Don't worry, the icing and sprinkles will cover it up and it will still taste good!)
  7. Let dough rest for 30 more minutes.
  8. Bake in oven at 370 degrees for 15 minutes. 
  9. Make icing by mixing the ingredients above. Spread it onto the the cake while it's cooling, and add the sugar sprinkles. 
  10. Enjoy!  
0 Comments

Look Ma! I made RICOTTA CHEESE!!!

1/4/2016

2 Comments

 
Picture
Guess what?! I learned how to make ricotta cheese at home and it was SUPER easy! It turned out so professional looking that I made Shane come into the kitchen to look at it before I used it to make lasagna!

You want the recipe? I'm not surprised. Here ya go! 

Ricotta Cheese

Picture
Ingredients: (makes about 1 cup of cheese)
  • 4 cups whole milk
  • 1/2 cup heavy cream
  • 1/4 teaspoon salt
  • 1 tablespoon lemon juice
Instructions:
  1. Line a strainer with a cheesecloth or a lightweight white cloth. (I used an old fancy tableware napkin.) Place the strainer over a bowl. 
  2. In a saucepan, heat the milk, cream, and salt to a rolling boil, then turn the heat down to medium. Add lemon juice and let it simmer, stirring constantly, until you start seeing curdles (about 5 minutes). The curdles are the ricotta cheese!
  3. Turn off the heat and pour it all into the lined strainer over the bowl. Let drain for about 15 minutes, then put it into a container in the fridge until you're ready to use it. (Lasts up to 2 days in the fridge.)
It's that easy! You should try it this week and let me know how yours turns out! 
2 Comments

The Secret to flaky, fluffy biscuits

9/14/2015

0 Comments

 
Picture
There's an art to making good biscuits. It's not as simple as buying a box of bisquick and following the recipe on the back. I've been searching for YEARS for the recipe that creates those mile high, flaky biscuits you seen in pinterest pictures, or at the least, match canned pillsbury biscuits. It turns out that it's not just the recipe I had to find, but also the technique! This recipe was adapted straight up from my Betty Crocker cookbook (with the minor substitution on self rising flour instead of all purpose), but my technique was adapted from numerous blogs out there on how to make those fluffy, flaky biscuits. The recipe is at the end, but let me first give you the picture book, step by step technique I used that succeeded and made me and my whole family happy, happy, happy....

Picture
First, you need to mix the dry ingredients together. Whisk together for a fluffy, well blended flour mixture.
Picture
For this next step, you need REAL butter and you need it to be COLD. Like, maybe even freeze it for a little while cold. Get out your cheese grater and FINELY shred that buttery goodness into the flour mixture. Blend it in with a whisk a little at a time. 
Picture
This is what is should look like after your flour and butter are whisked together. A little crumbly looking, but still powdery. Now, we want to keep that butter in there cold. I stuck that bowl in the freezer for a few minutes, rinsed dishes, and prepared for the next steps.
Picture
Make a well in the flour mix and pour in cold milk. Stir lightly until just mixed, but do not over mix! I succeed at doing this by telling myself to be lazy about it. 
Picture
Spoon the dough out onto a floured surface...
Picture
Sprinkle some flour on top and roughly flatten the dough. 
Picture
Here's the important part. The secret to flaky, layered biscuits. Fold the biscuit dough in half and lightly press down. You want it to bind together, but not mush. 
Picture
Turn dough and fold again. You want to make sure all the sides get folded. Fold and press dough a total of 10 times. No more, no less. 
Picture
Now get your rolling pin out and flatten that dough out to about an inch thickness. 
Picture
Get your biscuit cutter out and note these instructions as they are the second most important to mile high, flaky biscuits. Punch your cutter into the dough, then out. DO NOT twist! Twisting the cutter in the dough seals the edges and prevents the biscuit edges from rising. You can shake the cutter a little when punching it in to help separate the biscuit from the rest of the dough, just no twisting. Pull the cutter out and gently take the biscuit and place it onto a cookie sheet. 

Another important note: Get as many biscuits out of the dough as you possibly can without remolding the dough together. I only re-kneaded the dough together once to get the last few biscuits out I could. The more kneading you do at this point, the less flaky and good the biscuits would be. Just trust me. 
Picture
The hard part is over! Now you need to decide if you want to freeze these biscuits for later use, or bake them immediately. If baking, keep in the fridge until the oven is preheated, then bake. If freezing, stick the pan into the freezer for an hour for the biscuits to harden a little (not too long or they will dry out!). Take the biscuits out of the freezer, bag, and refreeze until you are ready to bake. 

I hope you enjoy! I like to make sausage biscuits in the mornings with these delights. Sometimes I'll eat one sausage biscuit, and one biscuit with jelly. But if I do that, I have to eat a smoothie for lunch to make myself feel better about my excess breakfast choices (worth it). 

Flaky, high rising Biscuits

(Makes about 15 large biscuits)
Picture


Ingredients:

  • 4 cups self rising flour
  • 2 tablespoons sugar
  • 1 cup COLD butter
  • 1 1/2 cups milk


Instructions:
  1. In a large bowl, whisk the flour and sugar together. 
  2. With a cheese grater, finely grate the butter into the flour mixture, whisking together after every half cup of butter is grated. Place bowl in the freezer when done grating and mixing. (The flour should be crumbly.)
  3. If baking immediately, pre-heat the oven to 450 degrees and measure out 1 1/2 cups of milk. 
  4. Take flour mix out of the freezer and whisk a well into the center. Pour the milk slowly into the well, and mix until JUST combined. 
  5. Spoon dough out onto a floured surface, sprinkle flour on top of dough, and pat down. 
  6. Fold dough in half and turn. Fold again, turn. Do this 10 times, then roll out into an inch thickness with a rolling pin. 
  7. Cut biscuits out and place them onto a non-stick cookie sheet. (Remember not to twist the cutter into the dough!)
  8. You can bake biscuits immediately for 10 - 12 minutes, or move onto the next step if freezing. 
  9. Freeze biscuits on cookie sheet for an hour. Take out of freezer, bag, and refreeze. 
  10. When you want to eat the biscuits, take out of freezer and put them onto a cookie sheet to sit while the oven warms up to 450 degrees. Bake for 10-12 minutes. 


The Three Main Secrets for PERFECT Biscuits:
1. Use frozen, grated butter to mix thoroughly into the dough. 
2. Fold the dough into itself TEN times. No more. No less.
3. Do NOT twist the biscuit cutter when cutting out the biscuits. 
0 Comments

Macaroni and Cheese

7/10/2015

0 Comments

 
Picture
Mmmm. Mac N Cheese. It's one of my favorites. I crave it a lot. I like to eat it by itself, with some kind of fried meat, or I like to add some chicken and buffalo sauce if I'm feeling zesty. The homemade kind is what I'm talking about here. That Kraft instant stuff is yucky and cannot be trusted. But why would you go through the trouble of buying that Kraft crap when the homemade stuff is so easy to make anyway?

Here's my recipe for some good, southern comforting macaroni and cheese...

Picture
Ingredients:
  • 8 oz box elbow noodles
  • 4 tablespoons butter
  • 1/4 cup flour
  • 2 1/2 cups whole milk
  • 3 cups sharp cheddar cheese

  • 1/4 to 1/2 cup crushed Ritz crackers
  • Salt and pepper, to taste
  • 1 cup sharp cheddar cheese, for topping
  1. Preheat oven to 350 degrees. 
  2. Cook noodles according to package directions, until al dente and drain. 
  3. In a small saucepan, melt butter over medium heat. Add flour and mix until combined and bubbling. Add in milk and stir together. Let warm up for 1 minute, then begin adding in 3 cups of shredded cheese, a handful at a time, stirring constantly. 
  4. Combine the sauce with the noodles and season with salt and pepper to taste. Pour into an 8 x 8 baking dish. Top with 1 cup sharp cheddar cheese and crushed Ritz crackers. 
  5. Bake for 20 - 30 minutes, until bubbly. 


If you want your mac and cheese to be as instant as the Kraft junk, you can pre-make and freeze it ahead of time. When I do this I make my sauce and noodles, combine them, separate into little ramekins, cover, and freeze. I can then take one out of the freezer whenever I'm hungry, and either warm it up in the microwave for a few minutes, or top with the extra cheese and crackers and bake. See? You don't have to eat that instant junk anymore... pre-make your own home made from scratch goodness and freeze for future instant meals! 
Picture
0 Comments

Make your own chicken fingers

7/7/2015

3 Comments

 
Picture
In addition to being stuck in a breakfast cereal rut growing up, I was also stuck in a sandwich rut. Unless I was eating a pizza with a hawaiian punch at school in jr high, I was home eating sandwiches. Naturally I became sick of the rut and now as an adult I rarely eat sandwiches. Now days, one of my favorite things to eat for lunches are chicken fingers...or chicken sandwiches ;-).  

I used to buy the frozen pre-made chicken fingers at the store, but since I discovered this recipe I don't have to anymore. These taste WAY better and I make them in advance and freeze them for those quick lunches (or dinners) on busy days. What's in those mediocre tasting, frozen store bought chicken fingers anyway?

 Chicken Fingers                           (Recipe makes about 4 servings)

Picture
    Ingredients: 
  • 2 chicken breasts cut into strips, or 8 chicken tenders
  • Tony's seasoning
  • 1 cup buttermilk (or milk with some lemon juice)

  • 2 cups all purpose flour
  • 3 teaspoons baking powder
  • 1 teaspoon salt
  • oil for frying

Instructions:
  1. Preheat a deep fryer to 350 degrees, or heat oil in a skillet on medium heat.
  2. Get out two bowls and two plates. Place chicken tenders on one plate and cover the second plate with paper towels. Sprinkle Tony's seasoning on the chicken tenders. (You just need one or two teaspoon's worth.)
  3. In one bowl, mix together the flour, baking powder, and salt. Pour your buttermilk into the second bowl. 
  4. Dredge your chicken into the flour mixture, then into the milk, and back into the flour.
  5. Fry chicken fingers in hot oil for 5 - 7 minutes. (If frying in skillet, make sure fingers are covered in oil, or turn them over after first side is cooked.) When done, transfer the chicken fingers onto the plate with paper towels to cool. 

I hope you enjoy your chicken fingers! As I said earlier, I make mine in advance and freeze them. When I'm ready for a quick lunch on a busy day, I place the frozen fingers on a cookie sheet and bake in the oven at 350 degrees for about 5 - 10 minutes.
3 Comments

1 Chicken, 4 family dinners

6/25/2015

4 Comments

 
Picture
This weekend I stopped by Costco to get some more chicken for dinners this month. Most people buy the already pre-packaged chicken breasts for such a thing, but I buy the whole chickens because they're cheaper and give me more meat for much buck (and free chicken broth!). I could have just purchased one of the pre-cooked chickens for less than $5, but I went ahead and opted to get the package of 2 uncooked whole chickens for $0.99/lb. 

I took one chicken, cut it up, divided it into bags (Cut up chickens give me 3 family meals but one individual meal. 2 breasts equal 2 family dinners, legs and thighs equal one baked chicken dinner, and the wings equal 1 serving of hot wings) This post isn't about that cut up chicken, but I will go on a wee little rabbit trail and show you this video if you're interested in cutting up your own chicekns (it's super easy!)...

Now that we've gotten that out of the way, it's time to talk about what I did with the other whole chicken. I plopped it into my handy dandy slow cooker, garnished it with salt and pepper, closed the lid and cooked it on high for about 3 1/2 hours. After it was done I turned the slow cooker off, removed the lid, and let it sit to cool for a couple of hours. (This is something I do while I go about my business of house chores. I typically only have to do this one day a month.)

When the chicken was cool enough to touch, I used my hands to shred it. I measured out 2 cups and divided into bags for larger meals, and had 2 1 cup bags of chicken for lighter meals. I had 6 cups total of cooked, shredded chicken meat. There are so many meal choices for this, but here are my favorites (click image for the recipe):
Picture
Picture
Picture
Picture
If you are grossed out by the raw chicken (I was at first) you can still by whole, cooked chickens for about $5 from Walmart, Costco, etc. How it is cooked and flavored at the store may limit your menu somewhat, but it may also give you some exciting new dishes. Either way, it's much cheaper and better than just buying frozen chicken breasts!
4 Comments

Best. Pizza. Ever

6/15/2015

5 Comments

 
Picture
It has taken me 7 years of researching, trial and error, but I've done it. I've finally mastered making the best pizza ever in my own home (in my humble opionion, of course ;-)). I've tried many pizza dough recipes, different ways of preparing the dough, different sauces, cooking methods, etc. There is some serious science in pizza making! If you are a fan of the New York style pizzas (crispy crust on the outside, while still soft on the inside), you'll want to keep reading. Go ahead and delete Dominos and Papa Johns from your phone because this pizza is not only better, but it takes just 8 minutes to cook!

The Supplies

Picture
Picture
First, we need to make sure you have your supplies. You need a pizza peel, a pizza STEEL (not a stone), an oven, and pizza dough that has been prepped and refridgerated. Let me explain...

The pizza peel is what will allow you to prep the pizza and slide it into and out of that hot oven. You need this because for the best pizza, you cannot prep and put that dough on a cold pan. Cold pans keep pizza from getting really crispy and it takes longer to bake.

Now about the pizza steel. Do you know why pizzas taste so good from your favorite pizza joints? Becasue that oven gets really, really hot. Our ovens at home do not get as hot. They can only go up to 500 or 550 degrees. That's where the steel comes in. The steel holds heat better, distributes it more evenly, and holds more heat than a pizza stone. The steel is heavy, thick, and going to last for years and years. If you like that light and crisp crust, you need a steel. 

Ok, now to the pizza dough. You need to make your dough in advance (either the morning before dinner, or one or two days beforehand) and refridgerate it. If you cannot do this or are making pizza last minute, you can buy pizza dough at the grocery store. It's usually in the bakery isle. 

Prepping and Baking

First, you want to preheat your oven to it's hottest setting (mine is 550 degrees). You'll also want to leave your pizza steel in the oven while preheating, and let it heat up for 45 minutes to an hour. I turned the stove on an hour before I was ready to bake, then went about my business of doing house chores and playing with Josiah. 
Picture
Next, take your cold dough out of the fridge and let it sit on the counter for a few minutes. You want to chill your dough after making it because the yeast does wonderful things in the process that makes the dough better. (Don't make me get all technical about this, just trust me.) You want to thaw it before forming it into your pizza pie shape because it's more pliable when it's thawed. 


Now if you are making pizza sauce (which I highly recommend), it's time to put that together. Mine is just a can of tomato paste, warm water, some honey, parmesan, garlic, and seasonings to taste. (The exact recipe is below.)
Picture
Now you want to prep your steel for spreading the dough out. Cornmeal is the best as it is tastier and allows that pizza to slide better but if you're in a pinch, flour will do. Be generous because you don't want that pizza to stick or you'll have a mess when transferring it! 
Picture
Just spread that dough out as thick or thin as you desire, and top it. 
Picture
Picture
Picture
Just slide that thing in the oven on top of the pizza steel and bake for 8 minutes!
Picture
Mmmmm. Enjoy!

Picture

Pepperoni Pizza

Picture
Dough Ingredients:
  • 1 packet active dry yeast
  • 1/2 tsp brown sugar
  • 1 1/2 cups warm water
  • 1 tsp salt
  • 2 tbsp oil
  • 4 cups flour
  • Corn meal (to spread the dough out on)
Pizza Sauce:
  • 6 oz tomato paste
  • 6 oz warm water
  • 3 tbsp parmesan
  • 1 tsp minced garlic
  • 2 tbsp honey
  • dash of onion powder
  • dash of italian seasoning
  • 1 tsp oregano
  • 1 tsp basil
  • dash of pepper and cayenne pepper
  • salt to taste
Instructions:
  1. If you have a bread maker, put all dough ingredients in, turn on the dough cycle, and walk away until it's done. If not... Dissolve the yeast and sugar in warm water and let sit for 10 minutes. Add in salt, oil, and 2 cups of flour and mix. Add in the remaining flour a little at a time, and knead the dough until it is no longer sticky. Form dough into a ball, and place in a greased bowl. Cover and let rise for an hour or until doubled in size. 
  2. After the bread maker has beeped and/or dough has risen: Punch dough down and reform into a ball. Place into a bowl that has been greased with oil. Flip dough over to coat it all with oil. Cover with plastic wrap and place it in the fridge for a minimum of 4 hours, or up to 2 days. 
  3. Preheat oven to its highest setting (500 to 550 degrees). Place the pizza steel in the oven and let it cook for 45 minutes to an hour. 
  4. When you are ready to make your pizza, take the dough out of the fridge and let it rest on the counter for 15 to 30 minutes. 
  5. Coat a pizza peel with corn meal. Turn dough out on the peel and spread it into your desired crust thickness. Top with sauce, cheese, and desired toppings. 
  6. Transfer the pizza onto the steel in the oven and bake for 8 minutes, or until crust is brown. 


5 Comments
<<Previous

    Hi! I'm Shauna. 

    I'm just an average housewife and mom trying to shop smarter, make good food, and spend less on living well. 

    Picture

    Archives

    September 2016
    April 2016
    February 2016
    January 2016
    September 2015
    July 2015
    June 2015
    May 2015

    Categories

    All
    3 Make Ahead Breakfasts
    4 Chicken Dinners
    Biscuits
    Blueberry Muffins
    Chicken Fingers
    Chili
    Cinnamon Rolls
    Drinks
    Foolaid
    French Bread
    Granola Bars
    Lemonade
    Pizza
    Pizza Sauce
    Pumpkin Cornbread
    Spaghetti And Meatballs
    Spaghetti Sauce
    Tea
    Whole Chickens

    RSS Feed

    Picture
About Me              
Frugal Challenges

Disclosure